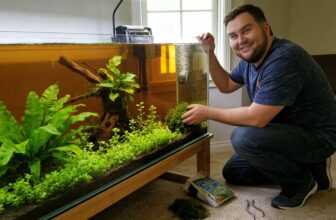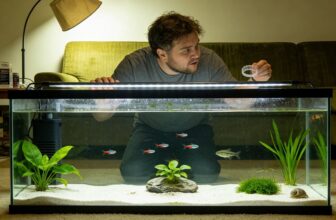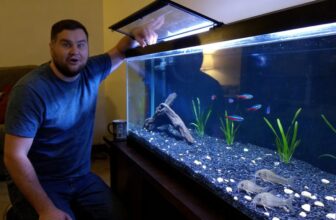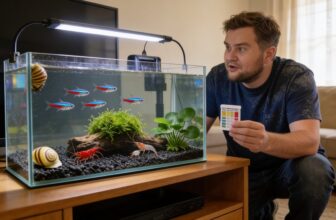
You can build a high-tech planted tank for about $210 with a Sodastream CO₂ adapter, ADA Aquasoil, and a decent filter.
That setup turns slow growers into lush carpets fast.
The Fluval F90 34-gallon is my go-to—its integrated LED lifts make maintenance easy.
Skip liquid fertilizers early; the soil feeds roots for months.
Use RO water with Equilibrium for stable chemistry.
Add cleanup crew gradually: snails, then shrimp, then Otocinclus.
Trim Bacopa weekly to keep the canopy clean.
Stick around—the exact cycling trick comes next.
At A Glance
- Budget $210 for CO₂ system, Aquasoil, and powerhead; cheap gear fails quickly.
- Use dry ADA Aquasoil topped with wet Colorado sand to prevent soil disturbance.
- Inject 2 bubbles/second CO₂ starting 30 minutes before lights for lush growth.
- Seed with ATM Colony bacteria on day one for 10-day cycle without ammonia spikes.
- Stagger cleanup crew: nerite snails day 10, Amano shrimp day 14, Otocinclus day 21.
How High-Tech Lighting and CO₂ Speed Up Plant Growth
So you crank up the lights and pump in CO₂, and suddenly your plants grow like they’re on steroids—but without the weird side effects. That’s the magic of high‑tech: intense LEDs deliver the energy, as CO₂ gives plants the fuel to use it. You’re not just watching growth; you’re orchestrating it.
So you crank up the lights and pump in CO₂, and suddenly your plants grow like they’re on steroids—but without the weird side effects.
- Strong light prevents algae by letting plants outcompete it.
- CO₂ injection turns slow growers into fast, lush carpets.
- You’ll trim Bacopa weekly, but that’s a good problem.
This combo makes you part of the inner circle—the ones who control the chaos. You belong here. To support this planted tank, a gentle bubble flow from a sponge filter protects sensitive fish and shrimp while maintaining clear water.
My Exact Budget for CO₂, Substrate, and Filtration Upgrades
That intense growth comes with a price tag, and I’m not just talking about your electric bill.
You’ll shell out about $110 for that CO₂ system, using a Sodastream adapter and dual-stage regulator.
ADA Aquasoil? Another $60.
Your Fluval 206’s fine, but adding a $40 Hydor powerhead for circulation is non‑negotiable.
Substrate’s a one‑time cost, but CO₂ refills? Expect $15 every few months.
You’re in for $210 upfront, easy.
Skip the cheaper gear—it fails fast.
Want to belong to the high‑tech club? Pay for reliability.
Your tank will thank you, and your algae won’t.
A dual‑stage regulator provides steady CO₂ flow and prevents dangerous pressure spikes as the cylinder empties.
Why the Fluval F90 34-Gallon Tank Worked for a High-Tech Setup
2. Integrated LED lifts for maintenance; you’ll reach in to plant or prune without fighting a bulky hood. Genius.
3. Open top lets you mount CO₂ gear easily—no drilling or modifications needed.
You’ve got the right start. The F90 simplifies installation, so you can focus on growing plants, not fighting equipment. It’s your ticket in.
When choosing a stand for your setup, consider models with 1,100 lb capacity for maximum stability.
The Filtration and Circulation Setup That Keeps Water Clean
You don’t need a hurricane in your tank, but you do need serious water movement—enough to keep CO₂ from pooling on the surface and plants from starving.
That’s why you’ll pair your Fluval 206 canister filter with a Hydor Koralia 240 powerhead.
That’s why you pair a Fluval 206 canister filter with a Hydor Koralia 240 powerhead.
The canister handles mechanical and biological filtration using Biomax Bio Rings and fine floss.
The powerhead pushes water across every leaf, distributing CO₂ evenly.
Without it, your plants struggle.
You’ll clean the pre‑filter sponges weekly—easy maintenance for crystal-clear water.
This combo keeps your high‑tech tank thriving, proving you don’t need complex gear, just smart circulation.
For tanks that rely on hang‑on‑back filters, models like the Cascade 300 include self‑priming after power outage features to maintain continuous circulation.
How I Layered ADA Aquasoil and Sand for the Perfect Substrate
After a few less‑than‑perfect setups, I finally nailed the substrate layer—by doing the exact opposite of what I did the first time. You pour ADA Aquasoil dry, then add pre‑washed Colorado sand wet—so you don’t create a mud pit. Mist it lightly, then plant before filling water. That order? Non‑negotiable.
Here’s what you’re really getting:
- Nutrient bank: Aquasoil feeds roots for months—no ferts needed at first.
- Clean divide: Sand stays separate, preventing fish from digging up soil.
- Easy reset: Misplace a plant? Pull it out without clouding the whole tank.
You’ll feel like you finally cracked the code. Many covers use high light transmission mesh to keep plants healthy without blocking growth.
Plant Every Species on Day One: and Which I’d Change
My first planted tank had me scattering plants like confetti at a parade—and that’s exactly what I’m telling you not to do. You need a plan, not a party. On day one, plant every species you intend to keep. No additions later.
Here’s what I’d change:
- Skip the monster Bacopa upfront. Stick it in back; it grows like crazy, blocking light.
- Place Cryptocoryne mid‑ground. They melt back, then bounce back—don’t panic.
- Use a diagram. Even a napkin sketch saves you from a messy layout.
Bottom line: Planting every species from the start stabilizes your system. You’ll belong with a clean, thriving tank. For gluing hardscape elements like rocks and wood into your layout, use a non‑toxic cyanoacrylate gel that sets underwater in seconds.
The One Mistake That Almost Ruined My Layout
When you’re so focused on the plants that you forget the hardscape, you end up with a layout that fights itself—and that’s the one mistake that almost ruined mine. I buried half my stones under substrate, leaving no room for roots or trimming. Don’t be me.
- Map your hardscape first — sketch where wood and rocks sit before adding soil. Plants can’t fix a crowded base.
- Leave trimming space — if your stone blocks your scissors, you’ll never shape that stem plant cleanly.
- Balance visual weight — spread rocks and wood so your eye moves naturally, not slams into a clump. You’ll thank yourself later.
Remember to secure driftwood to prevent collapse, as unstable wood can crush plants and disrupt your carefully planned layout.
Why You Need a Full Day (Not an Afternoon) for Your First Build
Even a well-planned high-tech tank will punish a rushed afternoon—and believe me, mine did.
Even a well-planned high-tech tank will punish a rushed afternoon—believe me, mine did.
You’re not just dropping in plants; you’re engineering a tiny ecosystem. Substrate needs careful layering (dry sand first, wet later), hardscape requires trial placement, and every stem demands precise tweezering.
Rushing means you’ll plant a monster Bacopa up front, blocking everything else. Your CO₂ lines, diffuser placement, and filter setup all need fiddling.
I spent nine hours, not three. That’s your reality too. Allocate dawn-to-dusk; skip the shortcut. Your future aquascape, stable and thriving, thanks you for it. Belong to the patient builders. Using straight and curved tweezers with anti-slip ridged grips is essential for delicate stem handling and precise placement of moss and stones without damaging the plants.
Why I Skipped Fertilizers the First Month (Tropica App Advice)
Why dose a month‑old tank with extra nutrients when the soil already has a full pantry? ADA Aquasoil packs enough food for weeks, so adding fertilizers then just invites an algae party you didn’t plan. Tropica App’s advice? It’s smart and simple: let plants settle first.
- Soil provides everything – Your aquasoil contains nitrogen and micronutrients, so liquid fertilizers become redundant and risky early on.
- Algae loves excess – Extra nutrients in a young, unstable tank fuel green water and slime outbreaks that outcompete your new plants.
- Less work, better start – Skipping fertilizers means fewer water changes and less fuss; you’ll add them later, once roots are established and growth demands it.
Trust the soil; resist the bottle. For setups up to 52 gallons, larger tanks may benefit from a compressor‑based VEVOR 52‑gal chiller to maintain stable temperatures during the establishment phase.
Set Up CO₂ Injection in 5 Simple Steps: Bottle to Drop Checker
Before you can grow plants like a pro, you’ve got to get CO₂ from the bottle into the water without turning your tank into a fizzy science experiment. Here’s your five-step cheat sheet, from bottle to drop checker. Trust me, it’s simpler than assembling IKEA furniture.
| Step | What You Do |
|---|---|
| 1 | Connect your Sodastream bottle to a dual-stage regulator (about $150). |
| 2 | Attach a bubble counter with check valve—count those bubbles. |
| 3 | Run tubing to your atomizer, placed near filter output for max dispersal. |
| 4 | Set solenoid on a timer: starts 30 min before lights, stops with them. |
| 5 | Aim for 2 bubbles/second; watch drop checker turn green—that’s your sweet spot. |
You’ve got this. We’re all tweaking our CO₂ together.
How I Cycled the Tank in 10 Days Without Ammonia Spikes
Now that your CO₂ system is running and the lights are on, let’s talk about the part everyone dreads: cycling. I lucked into a 10-day cycle with zero ammonia spikes—embarrassingly easy, actually.
- Seed with ATM Colony. This bottled bacteria works fast; you add it day one. No waiting weeks for nature to catch up.
- Use ADA Aquasoil. It leaches ammonia slowly, feeding the bacteria without a toxic spike. Free fertilizer, basically.
- Change 25% water twice weekly. Dilutes any extra nitrogen, keeps parameters stable. Overkill? Maybe. Worked? Absolutely.
Tank cycled, fish safe, you’re part of the club now. You should also maintain a calcium-to-phosphorus balance of 3:1 for any turtles you might add later.
Why I Use RO Water and How I Safely Add Minerals Back
After that breakneck 10‑day cycle, I got to the part most guides gloss over: water chemistry.
You need RO water since tap is a wild card—chloramines, varying hardness, algae fuel. RO strips everything, giving you a blank slate. But blank water kills plants and shrimp fast.
RO strips everything, giving you a blank slate. But blank water kills plants and shrimp fast.
So you add Seachem Equilibrium, one teaspoon per 25 liters. That’s it. It safely puts back calcium, magnesium, potassium—no guesswork. No mixing five powders. You get stable GH, happy plants, zero melted leaves. To further protect sensitive livestock, you can add Seachem Prime to detoxify any residual ammonia from your source water.
Bottom line: RO water plus Equilibrium gives you control without complexity. It’s the cheat code for high‑tech success. Don’t skip it.
Add Shrimp, Snails, and Otocinclus Gradually (Days 10–21)
When that chemy wizardry buys you control, the real payoff comes days 10 through 21—when you slowly stock the cleanup crew. Your tank’s cycled, ammonia’s zero, but you’re still building stability. Start with nerite snails; they’ll polish algae without breeding. Next, add Amano shrimp—they’re relentless glass-cleaners. Finally, introduce a trio of Otocinclus catfish; these tiny suckers gently graze leaves without disturbing roots. Unlike many bottom feeders, Otocinclus require a group of 6‑8 to thrive and reduce stress.
- Nerite Snails (day 10) – No babies means no population explosion. They’ll scrub glass and hardscape while you watch.
- Amano Shrimp (day 14) – Voracious algae eaters that leave plants alone. Their constant grazing builds calm.
- Otocinclus Catfish (day 21) – Gentle bottom-dwellers that need biofilm. Offer zucchini if algae runs low.
Staggering these workers creates a balanced team you can trust.
How Frequent Trimming Keeps Fast Growers Like Bacopa in Check
You’ll quickly learn that fast growers like Bacoba and Echinodorus don’t just grow—they *explode*, turning your scape into a messy jungle if you don’t stay on top of them.
So grab your scissors weekly. Snip stems down to your desired height, replant the tops for more density.
Don’t let them overshadow slower plants.
You’re part of a club that respects order.
A 15‑minute trim every Saturday keeps everything tidy, prevents algae from stealing nutrients, and makes your tank look deliberate—not abandoned.
Trust me, neglecting that Bacopa? You’ll regret it faster than it grows back.
Stick with the routine, and you’ll belong.
While trimming, consider using a manual siphon bulb to vacuum debris stirred up from the gravel bed, keeping waste from fueling algae.
Frequently Asked Questions
What Happens if I Skip the Co₂ System Entirely?
If you skip the CO₂ system entirely, your high-tech tank becomes a low-tech one.
That intense light you paid for? It’ll feed algae, not plants, without CO₂.
You’ll lose the lush growth and be forced to choose only slow, hardy species like Anubias.
Your budget still hurts—quality soil and gear are sunk costs.
Bottom line: either commit to CO₂ or downsize the light and save the hassle.
You’re just burning cash otherwise.
Can I Use Tap Water Instead of RO Water?
You can use tap water, but it’s a gamble. Your local water might contain chloramines or minerals that stunt plant growth or spike algae.
If you’re set on tap, grab a dechlorinator that handles chloramines and test for hardness first. Hard water + high light? You’ll fight algae forever.
Bottom line: RO water removes variables and gives you control. For $0.30 per gallon, you skip headaches. Tap’s free but risky—your call.
How Do I Clean the ADA Aquasoil Without Disturbing It?
You don’t really “clean” ADA Aquasoil—it’s meant to break down over time, releasing nutrients.
Gently vacuum the surface, hovering just above the substrate, to suck up debris without disturbing the soil.
Avoid deep poking or stirring, which creates a muddy mess.
Siphoning lightly during weekly water changes does the trick.
Accept slight cloudiness as normal; it settles fast.
This method keeps your aquascape intact.
When Should I Start Trimming Plants for the First Time?
You should start trimming plants around week three or four, once they’ve established roots and new growth is obvious.
Don’t rush it—those early leaves are feeding the plant.
Snip stems just above a node (that’s the bump where leaves sprout) to encourage bushier growth.
If you waited too long, like I did with that monster Bacopa, you’ll be wrestling a jungle.
Trim a little, not half the plant.
What Shrimp Species Are Safest for a New High-Tech Tank?
Go with Amano shrimp. They’re the safest bet for a new high-tech tank since they’re tough, eat algae like crazy, and won’t touch your plants.
Ghost shrimp are cheaper but less reliable.
Cherry shrimp look great but are more sensitive to CO₂ swings, so hold off until your system stabilizes.
You want shrimp that survive your learning curve, not ones that become expensive snacks.
Start with a handful of Amanos—they’ll earn their keep.
Rounding Up
So, did it work? Yeah. Ten days to cycle, zero ammonia spikes, and my Bacopa grew so fast I felt like a plant barber. That Fluval F90 and the CO₂ system cost about $600 total, but you skip the algae nightmares. The trick? Layering ADA Aquasoil under sand, then seeding with ATM Colony. You can do this without panic—just follow the recipe, trim hard, and don’t skip RO water. Bottom line: a high-tech tank you can actually pull off.