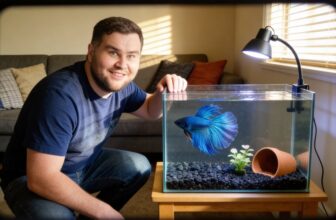
You’ll want a 10‑gallon tank for your first shrimp setup—anything smaller is a death trap with rapid water swings.
Start with cherry or snowball shrimp; they’re forgiving of mistakes and breed in pH 7.0‑8.0.
Use a gentle sponge filter ($10‑$15) and inert sand or gravel.
Add java moss, cholla wood, and driftwood for hiding spots.
Stock no more than five shrimp per gallon.
Keep going to nail the feeding and molting tricks.
At A Glance
- Start with a 10-gallon tank for stable water parameters and beginner forgiveness.
- Stock up to 5 dwarf shrimp per gallon with pristine water and gentle filtration.
- Use a sponge filter attached to an adjustable air pump for gentle water flow.
- Add java moss and cholla wood for biofilm growth, hiding, and breeding support.
- Place dark substrate to enhance shrimp colors and inert sand for Cherry species.
Why These 5 Shrimp Species Work Best for Beginners
Why would a beginner even think about starting with shrimp instead of fish? Since you’re joining a club where tiny, low‑maintenance cleanup crews rule.
Cherry Shrimp, for example, top out at 1.4 inches, cost about $4 each, and breed like crazy in pH 7.0‑8.0 water. Amano Shrimp hit 2 inches, eat algae like pros at pH 6.0‑7.0, but you won’t breed them—they’re wild‑caught. Crystal Red Shrimp flash vivid stripes at pH 6.5‑7.0, though they’re sensitive. To prevent stress and aggression in the tank, maintain balanced stocking density for all inhabitants. Snowball Shrimp stay milky‑white, hardy, and prolific. To keep a peaceful environment for all tank inhabitants, aim for a 1:3 male-to-female ratio if adding guppies as tank mates. Bottom line: start with Cherries or Snowballs—they forgive your mistakes.
Choose the Right Shrimp Tank Size Before You Buy Anything
You’ve picked your shrimp species, so now let’s talk homes—specifically, the tank size. Don’t overthink it, but don’t underthink it, either. Your shrimp’s life literally depends on this decision, so let’s make it smart.
- 10‑15 gallons (40–55 L): Sweet spot for beginners—easy to manage, cheap, and stable.
- 5 gallons or less: A death trap for most species; water swings kill fast.
- 20 gallons or more: Luxurious, but you’ll fight algae and waste more money.
- Standard density rule: ≤5 shrimp per gallon; push to ≤15 only with pristine water.
- Bottom line: Start at 10 gallons—it’s forgiving, not overwhelming.
A 10-gallon tank buys you breathing room. Save the nano-tanks for your desk plants, not your shrimp. Avoid bright, harsh illumination and instead use dim lighting and floating plants to create dappled shade that reduces stress and supports biofilm growth. For those considering a smaller setup, note that a 3‑gallon tank limits shrimp to only a few individuals and requires careful filtration and frequent maintenance to stay stable.
Set Up Gentle Sponge Filtration for Shrimp
How do you keep shrimp alive without turning their tank into a washing machine? You install a sponge filter—it’s that simple. Sponge filters provide gentle, biological filtration without sucking in shrimplets or blasting your colony with current. They’re cheap, around $10-$15, and whisper-quiet. For shrimp and fry handling, a fine-mesh nylon net prevents scooping up delicate creatures.
- Attach it to an air pump with adjustable valve.
- Position it away from strong outflow to keep water calm.
- Clean by squeezing it in tank water every 2-3 months—never tap water, or you kill beneficial bacteria.
For optimal performance, consider using a 100-micron polishing pad to capture fine particles and achieve crystal-clear water without harming delicate shrimp.
Your shrimp will thank you with stable parameters and active grazing. It’s the low-tech, high-trust option you want in your tank.
Pick the Perfect Substrate for Shrimp Health and Plants
What’s the one thing your shrimp will spend their entire lives crawling over, grazing on, and occasionally digging through? It’s their substrate, everyone, so don’t mess this up. You’re building a home, and they’re counting on you.
- Active soil (like Controsoil, $35‑$40/bag) buffers pH for Caridina species, softens water, and feeds plants. Cherry keepers? Stick with inert sand or gravel. For a natural look without altering water chemistry, try a prairie riverbed aesthetic with Aqua Natural Prairie Sand.
- Grain size matters—fine sand (0.5‑1 mm) lets them sift without injury; sharp or large gravel traps food and crushes tender legs.
- Depth should be 1‑2 inches: too thin exposes roots, too deep traps anaerobic gunk.
- Color impacts color—dark substrates make reds pop; light washes them out.
- Safety check: rinse everything twice; dust clouds suffocate gills.
Bottom line: match substrate to your shrimp type, and you’re a further advance toward the cool kids’ tank club.
For keeping glass spotless during maintenance, a FLIPPER Magnetic Aquarium Cleaner works well on both glass and acrylic tanks.
Add Driftwood and Rocks That Shrimp and Plants Love
Your shrimp just spent the last five minutes sifting through that sand you picked out, and now they deserve some furniture.
Driftwood isn’t just decor; it’s a biofilm buffet. For nano tanks, small flat driftwood pieces provide a low profile that won’t overwhelm the scape.
Driftwood isn’t just decor; it’s a biofilm buffet.
Cholla wood, for example, costs around $5 per piece and slowly releases tannins that buffer pH down to 7.0—perfect for your Caridinas.
River rocks, like smooth Indian almond stones, add surface area for beneficial bacteria without altering hardness. Just boil them first, okay? No sharp edges.
Your colony will graze, hide, and molt on these safe zones.
Bottom line: pick porous, chemical-free materials, and your shrimp will feel right at home.
If you later add a cover net, opt for a magnetic aquarium lid for easy access during feeding without disturbing your shrimp.
Best Live Plants That Provide Shelter and Biofilm
If live plants have a superpower, it’s making your shrimp tank look like a lush, oxygenated jungle, doubling as an all‑you‑can‑eat biofilm buffet. You want that, right? Pick the right greens, and your colony feels safe and fed without you lifting a finger.
- Java moss – cheap, grows like crazy, perfect shrimp highway for biofilm grazing.
- Marimo moss balls – no‑maintenance spheres that house endless biofilm.
- Java fern – tough, low‑light leaves where shrimplets hide and snack.
- Water sprite – feathery fronds catch waste, grow fast, offer dense cover.
- Anubias nana – slow‑grower you tie to wood; leaves gather biofilm like breakfast plates.
Bottom line: these plants turn your tank into a biofilm factory your shrimp will never want to leave.
For extra hiding spots, add a Jungle Vallisneria bundle to create tall, waving cover along the back of the tank.
For a durable base to anchor these plants, consider natural slate stone as a stable platform.
Drip Acclimate New Shrimp the Right Way Every Time
Before your shrimp hit the water, you need to drip‑acclimate them. It’s the only way to avoid shocking new, sensitive stock.
Grab a container, some air tubing, and a clip. Set the bag’s water aside—never pour that into your tank. Start a slow drip, one drop per second, using a simple valve. Let it run for at least an hour, longer for Crystal Reds. Ensure your tank has gentle sponge filtration to prevent strong currents that could stress newly acclimated shrimp.
This slow mixing helps shrimp adjust to your water without stress. You’re giving them a gentle shift, like easing into a hot bath instead of cannonballing. Do it right, and they’ll thrive, earning their spot in your community, much like providing ample caves and reduced current to alleviate stress for sensitive tank inhabitants.
What Water Parameters Each Species Actually Needs
What’s the secret to keeping your shrimp alive and actually thriving? Nail the water parameters—each species has a sweet spot, and you don’t want to guess wrong. Forget “close enough”; that’s a recipe for sad, stressed shrimp.
Nail the water parameters—each species has a sweet spot, and guessing wrong leads to stressed shrimp.
- Neocaridina (Cherry, Snowball): pH 7.0-8.0, 70-75°F—hardy beginners.
- Caridina multidentata (Amano): pH 6.0-7.0, 68-75°F—tough algae eaters.
- Caridina cantonensis (Crystal Red/Black): pH 6.5-7.0, 66-73°F—fussy but gorgeous.
Soft, slow-moving water—they hate currents like we hate surprise bills.
Test kits are your best friend—ammonia zero, nitrates low.
Get these right, and your colony will feel right at home.
Cycle Your Shrimp Tank Faster With Used Filter Media
You’ve got your water parameters dialed in, but if you set up a bare tank and wait for the cycle to finish naturally, you’re looking at four to six weeks of twiddling your thumbs. Instead, grab used filter media from a friend or your local fish store. That gunk isn’t gross; it’s pure gold—loaded with beneficial bacteria that turn ammonia into nitrites, then nitrates. You’ll cut your cycle to under two weeks, easy.
| Donor Source | Cycle Time |
|---|---|
| Friend’s tank | 5–10 days |
| Local fish store | 7–14 days |
| Your old tank | 3–7 days |
| Bare-rock media | 8–12 days |
Just rinse the media in tank water, squeeze it into your sponge filter, and let the bacteria do your dirty work. You’re not waiting anymore—you’re jumping in. For a secure, food‑grade seal on your filter tubing connections, use push‑to‑connect fittings that require no tools or threading. A protective inlet cover on your equipment prevents shrimp from being drawn into the tube during water changes.
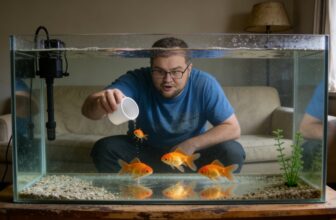
Feed Shrimp Sparingly: How Much and How Often
Since you got your tank cycled and stocked, you might think feeding time is where you finally get to play chef. Hold up—shrimp are scavengers, not gluttons. Overfeeding spikes ammonia, killing your colony.
- Feed once every 2–3 days—a tiny pinch, smaller than a pea.
- Remove uneaten food after 2 hours—it fouls the water fast.
- Stick to one type of pellet (like Hikari Crab Cuisine, ~$10) to avoid pickiness.
- Watch for grazing behavior—if they ignore food, you’re overdoing it.
- Supplement with blanched spinach (once weekly) for variety—rinse first.
Bottom line: less is more. You’re part of the “underfeed club” now—we keep shrimp alive longer.
For established tanks, consistent testing ensures tank stability and early problem detection, with recommended testing 2–3× weekly.
To further support healthy molting, use a shrimp mineral supplement like NeoTiger KH+/GH+ to raise calcium and magnesium levels in reverse-osmosis water.
Do Weekly Water Changes That Don’t Stress Shrimp
Since shrimp hate surprise guests—and dirty water is the worst kind—weekly changes are your ticket to a stable colony.
You’re not just swapping water; you’re removing waste that spikes ammonia.
Siphon gently, taking 10‑20%, and drip the fresh, conditioned water back in slowly—a turkey baster works for tiny tanks.
Match temperature exactly; a 2‑degree swing stresses them.
Use a bucket, not a hose; sudden pressure kills.
You’ll see happy grazing and clear molts.
It’s your insider move.
Stick to this, and you’re part of the crew that keeps shrimp thriving, not just surviving.
For accurate checks, test ammonia levels at least twice weekly using a reliable kit, and consider a 11‑in‑1 Aquarium Test Strips Kit for broader parameter coverage.
How to Calculate Safe Stocking Density for Your Shrimp Tank
Before you add a single shrimp to your tank, you need to know the math—otherwise you’re just overcrowding a floating box. For dwarf species under 1.5 inches, stick to 5 shrimp per gallon. Push it to 15 per gallon only if you’ve nailed pristine water, heavy filtration, and low waste. Overcrowding spikes ammonia, stresses your colony, and crashes your setup—nobody wants that. To confirm your water is truly safe, you must also test iron at least weekly because trace iron fluctuations can stress sensitive shrimp even when other parameters seem fine.
Before you add shrimp, do the math—overcrowding crashes tanks.
- Count total gallons of your tank (not filled to the brim).
- Multiply by 5 for a safe starting point.
- Use 15 only with perfect parameters and a sponge filter.
- Subtract 1 shrimp per gallon for every inch above 1.5.
- Double-check your bioload before adding more.
Bottom line: start low, watch closely, and join the club of successful shrimp keepers. Confirm your water is safe using a reliable API GHKH lab-accurate test kit to monitor hardness and pH levels critical for shrimp health.
Spot Shrimp Molting Problems and What They Mean for Water Quality
Check your GH with a liquid test kit; aim for 4-8 dGH for Neos, 5-6 for Caridinas.
Crush a cuttlebone or add Shrimp Mineral to buffer.
Additionally, test pH stability—driftwood helps buffer.
For human consumption, enteric-coated tablets improve alkaline balance by bypassing stomach acid.
For pond and tank use, products like Brightwell MicroBacter XLM offer documented CFU counts to boost biological filtration and support stable water parameters.
Bottom line: happy molts = stable water, and stable water means more berried females carrying eggs soon.
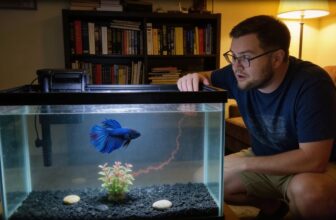
Encourage Shrimp Breeding With Stable Temperature and Hiding Spots
Even stable water is non‑negotiable, the real secret to turning your tank into a shrimp‑breeding factory is dialing in two things you can actually control: temperature and hiding spots. You want a heater that locks in 72–75°F—any swing stresses molters. Then pack in shelters like cholla wood or java moss. Your shrimp need to feel safe to feel frisky. For added security when building caves, use a reef-safe epoxy putty that sets in 5 minutes and cures fully within 45 minutes.
The real secret is nailing temperature and hiding spots—your shrimp need safety to breed.
- Set a heater with a built-in thermostat ($15–30); avoid cheap stick‑on ones.
- Keep temp within 2°F of your target; digital thermometers ($8) catch drift fast.
- Add dense java moss mats for shrimplets to hide in.
- Use cholla wood ($5 for 5 pieces); it feeds biofilm and offers caves.
- Place driftwood near sponge filters for calm, safe current.
Frequently Asked Questions
Can I Keep Different Shrimp Species Together in the Same Tank?
Yes, you can, but you shouldn’t mix genera.
Stick with Neocaridina species like Cherries and Snowballs—they share similar pH (7.0–8.0) and temps (70–75°F), so they’ll thrive alongside without stress.
Avoid Caridina, like Crystal Reds, since their needs differ (pH 6.5–7.0, cooler water).
Mixing them invites trouble: hybrids lose color, and wild‑caught Amanos (Caridina) are tricky breeders.
Keep it simple—one genus per tank for a peaceful colony.
That’s your best bet.
How Long Does It Take for Shrimp Eggs to Hatch?
It’s not a fast pregnancy, sorry.
Most freshwater shrimp eggs hatch in 3 to 4 weeks, depending on temperature and species.
Warmer water, up to 75°F, speeds things up; colder slows them down.
You’ll notice a saddle of eggs under the female’s tail, then watch them turn from dark to clear right before hatching.
Patience is key—don’t mess with the tank. Keep parameters stable, and those tiny shrimplets will appear.
That’s the payoff for your chill wait.
What Do I Do if a Shrimp Dies in the Tank?
Don’t panic—leave it in.
Remove it only if it’s fuzzy or smells foul; a clean corpse becomes a calcium snack for molting shrimp, recycling nutrients.
Check ammonia first thing—if it spikes above 0 ppm, do a 20% water change fast.
Test your parameters weekly after that.
Over‑removing hides stress triggers, so stay chill.
Bottom line: dead shrimp equals free fertilizer—just keep an eye on your cycle.
Do I Need to Add Calcium for Better Shrimp Molting?
Yes, you do. Most tap water lacks enough calcium for healthy molting, so supplement it. You’ll avoid half‑shelled deaths that way.
Your go‑to? Shrimp‑specific mineral stones or Wonder Shells—$8–15, slow‑dissolve, last months. Crushed coral in your filter works too. Don’t add straight calcium powder; messes up pH.
Test your water’s GH/KH first.
Bottom line: for under $12, you save $50+ in losses and keep your colony thriving. You’re part of the molting‑success club now.
How Can I Tell if My Shrimp Are Stressed?
You’ll spot stressed shrimp by their behavior. They dart frantically, stop eating, or hide constantly.
A healthy shrimp grazes calmly on biofilm—that natural slime layer on driftwood or your sponge filter—but a stressed one won’t touch it.
Look for pale, milky coloring instead of solid red or blue; that’s a bad sign. Additionally, check for failed molts—a half‑shed shell stuck on them.
Keep water stable around 68‑75°F, pH matched to your species, and you’ll have happy little cleaners.
Rounding Up
So, you’ve got a tank, some shrimp, and—maybe—a prayer. Don’t overthink it. Stick with Cherry Shrimp (hardy, cheap, breed like rabbits) and a 10-gallon tank. Use a sponge filter ($15 on Amazon), inert sand, and add one piece of driftwood for biofilm. Change 10% water weekly, slowly. If you see failed molts, check your GH—probably too low. Bottom line: steady parameters = happy shrimp. You’ve got this. Probably.