Setting up a fish tank for beginners starts with one critical decision: tank size. A ten-gallon might seem manageable, but it’s a trap—limited stock choices and wild parameter swings await.
A 20-gallon glass tank hits the sweet spot at roughly $30. Stable, forgiving, and genuinely beginner-friendly.
Never park it in direct sunlight unless you fancy algae armageddon. Pair it with a steel stand; particleboard warps and weeps when wet.
Double your filtration capacity—a 40-gallon rated unit running on 20 gallons of water works magic at another $30. Skip weekly testing with a reliable kit like API Master, and you’re gambling with livestock. Add fish gradually; the biofilter needs time to colonize.
There’s more lurking in the details.
At A Glance
- Start with a 20-gallon tank for stability; avoid ten-gallon tanks.
- Cycle tank 4–8 weeks before adding fish to prevent ammonia spikes.
- Use a heater and thermometer to maintain 75–80°F for tropical fish.
- Choose an oversized filter rated for double your tank’s volume.
- Treat tap water with dechlorinator to remove chlorine and chloramines.
Beginner Mistake #1: Choosing a Tank Too Small for Your Fish
Your first instinct might be a ten-gallon tank—it’s cheap, easy to find, and fits on a desk. But that small water volume limits your fish choices fast.
A 20-gallon tank is the real starter sweet spot. It gives you more tank height for active swimmers and stable water conditions.
A 20-gallon tank is the real starter sweet spot, offering height for swimmers and stable water.
Bigger tanks mean fewer temperature swings and less waste buildup. You’ll spend less time fixing problems and more time enjoying your setup.
Trust us: start bigger, avoid the upgrade itch. Your fish will thank you, and you’ll feel like you belong to the smart-tank club.
For goldfish, remember that minimum 20 gallons per fish is essential for healthy growth and to prevent rapid ammonia spikes. If you do begin with a ten-gallon, models like the Aqueon starter kit come with essential equipment to get you started.
Why Placing Your Tank in Direct Sunlight Kills Your Budget
So you dodged the too-small tank trap, good. Now, tank placement matters—badly.
Direct sunlight seems free, but it’s a budget killer. Sunlight fuels algae blooms; you’ll spend more on scrapers, chemicals, and extra filters fighting green goo.
Heating costs spike since sun heats unevenly, causing heater overwork. Lights? Algae loves them too, forcing premature bulb replacements. Using a tool like a magnetic aquarium cleaner can help manage the inevitable algae, but it is still an added expense.
The budget impact is real. Place your tank away from windows. Calm water, stable temps, less cleanup.
Bottom line: save cash, avoid the sun—your wallet and fish thank you.
Even a small bowl like the Vimvins 2‑Gallon Glass tank will overheat and grow algae if placed in direct sun.
Glass vs. Acrylic: Which Material Do Beginners Get Wrong?
Glass tanks and acrylic tanks: beginners pick the wrong one all the time. Glass is heavier and cheaper upfront—a 20-gallon glass tank runs about $30, whereas acrylic costs double.
But tank weight matters: acrylic is lighter, easier to move, and won’t shatter if bumped. Nonetheless, it scratches if you look at it funny. Glass resists scratches but adds serious weight to your stand.
Cost comparison? Glass wins for budget; acrylic for portability. For most beginners, glass is the smarter pick—scratch-proof and wallet-friendly. Acrylic belongs to those who never drop a sponge.
However, low‑iron glass reduces the green tint and improves light transmission to around 91%, making fish and plants appear more vibrant. A rimless design further enhances visual appeal and viewing clarity.
The Stand Mistake That Weakens Your Tank’s Support
Skipping a proper stand is the fastest way to turn a beautiful fish tank into a very wet, expensive floor problem.
You’re miscalculating weight if you trust a flimsy dresser or nightstand—water weighs 8.34 pounds per gallon, plus gravel and glass. That’s 200+ pounds for a 20-gallon. To safely support that load, choose a stand with heavy-duty steel stands that often include built-in outlets.
Ignoring dampness seals your stand’s fate; particleboard swells, sags, then fails.
The OllieHutch Farmington stand (about $100) holds 10–20 gallons safely, with open-back access and laminated MDF.
Don’t risk it—buy a stand built for aquariums, not furniture. Your floor, and your fish, will thank you. For larger tanks, heavy-duty metal stands with weight capacity 900 lb provide reliable support and built-in power outlets.
Buying a Filter Too Weak for Your Tank’s Volume
Choosing a filter that’s too weak for your tank is like buying a tiny umbrella for a monsoon—you’ll get soaked. A weak filter guarantees filter malfunction; ammonia spikes, fish gasp.
Your biological filter media, that precious bacteria colony, needs steady flow to thrive. Without it, media maintenance becomes a clogged mess you can’t ignore. The rule? Pick a filter rated for double your tank’s volume—on a 20-gallon, a 40-gallon model costs $30 and saves headaches. You want clear water and happy fish, not a murky disaster. For a 20-gallon tank, choose a filter like the VILLNO 130 GPH which meets the sweet spot for flow and capacity. Over-filter. It’s cheap insurance. Your tank will thank you. Many submersible filters, such as the AquaMiracle QF088, provide quiet multi-stage sponge filtration that keeps water clear without disturbing your fish.
Why Skipping a Heater Is a Fatal Error for Tropical Fish
One mistake beginners make is skipping the heater entirely, assuming their tropical fish can handle room temperature. That assumption? Deadly. Most tropical fish need 75–80°F, and a cold draft can drop the tank fast—fatal for them.
Heater selection matters: choose one rated for your tank size. The Fluval M 100-Watt Heater ($35) reliably heats up to 30 gallons, ensuring temperature stability. A 100-watt unit works for 20-gallon tanks; adjust wattage for larger volumes. For larger tanks, consider models like the Fluval E 300W with ±1°F accuracy and a five-year warranty. For nano tanks under 5 gallons, an energy-efficient 25W heater with overheat safeguard prevents dangerous temperature spikes.
Without a heater, you risk losing your fish. Don’t gamble with their lives. A proper heater is non‑negotiable—tropical fish depend on it.
Never Rely on a Heater Without a Thermometer
- Verify actual temp—heaters lie; thermometers catch faults before fish gasp.
- Check uniform heating—place thermometer opposite heater; confirm whole tank stays warm.
- Prevent silent failure—a stuck-on heater fries fish; a cold one stuns them.
Join the smart crowd who double‑check.
Thermometers cost under $15; vet bills don’t exist for fish.
Most digital models offer ±1 °C accuracy, matching lab-grade performance for reliable readings.
Models like the Petbank LCD Digital achieve even higher precision at ±0.1 °C for sensitive species.
Leaving Lights On 24/7: The Fast Track to Algae
A 24/7 light schedule is the single fastest way to turn your tank into a green soup. Algae loves constant illumination, and your fish need a natural rhythm to thrive.
A 24/7 light schedule turns your tank into green soup—algae loves it, fish don’t.
Light timers, like the AQUANEAT LED’s built-in option, automate a consistent 8‑10 hour cycle. They prevent forgetfulness and keep algae at bay.
- Natural rhythm: Fish rest and behave normally with a day/night cycle.
- Light timers: Simple, cheap, and reliable; avoid the green mess.
Bottom line: Buy an outlet timer (around $10) or use a programmable LED. Your tank stays clear, your fish stay healthy, and you avoid scrubbing algae weekly.
Models like the Fishkeeper Smart LED feature an IP67 rating and sealed silicone construction, providing reliable waterproof protection even against direct spray.
For low-voltage setups, inline barrel controllers offer plug-and-play dimming and sunrise/sunset simulation.
The #1 Beginner Fish Tank Mistake: Adding Fish Before Cycling
The most common mistake new fish keepers make is adding fish before the tank has finished cycling. Tank cycling builds beneficial bacteria that convert toxic ammonia to safer nitrates. Without this, fish suffer ammonia burns or death. Successful fish keeping requires cycling patience.
- Buy a liquid test kit ($25); test ammonia, nitrite, nitrate levels weekly.
- Add a pure ammonia source (DrTim’s, $12) to feed bacteria; keep ammonia at 2-4 ppm.
- Wait 4–8 weeks until ammonia and nitrite read zero; then add fish slowly.
For reliable results, use an API Master Test Kit which offers 800 liquid tests for ammonia, nitrite, and nitrate. Storage in a cool, dark place preserves reagent accuracy and prevents degradation. Rushing this step kills fish. Patience now saves frustration later. Your tank will thrive when completed correctly.
Using Tap Water Without Conditioner: A Chemical Disaster
Impatience with a water conditioner bottle is a surprisingly common route to a dead fish tank.
Impatience with a water conditioner bottle is a surprisingly common route to a dead fish tank.
Tap water contains chlorine and chloramines, which are toxic to fish gills and beneficial bacteria.
Skipping chlorine removal means certain death for your new aquarium buddies.
Chemical dechlorination is the only safe fix—it’s cheap, fast, and simple.
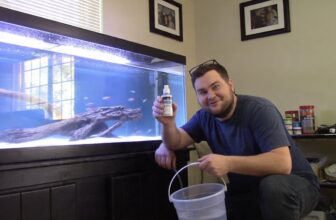
A bottle like API Tap Water Conditioner, around $5, treats 10 gallons with just a few drops.
No room for shortcuts here.
For a healthy tank, conditioner should become your best friend.
Remember: always add conditioner before water touches the tank.
Skip it once, and you’ll start from scratch.
Bottom line: never fill a tank without it.
For tanks with sensitive species, a premium option like Hikari Ultimate provides added vitamins and electrolytes for improved fish health.
Why Biological Starter Bottles Save Your First Fish
Fish keepers’ eagerness to add fish often ignores the tank’s invisible ecosystem. Biological starter bottles save your first fish by instantly seeding the filter with helpful bacteria, accelerating the nitrogen cycle.
Their bottle efficacy depends on live cultures, so check expiration dates. Without them, ammonia spikes kill fish fast.
- Prevents Silent Killers: Bottled bacteria convert toxic ammonia to safer nitrates within days, not weeks. Products like Microbe‑Lift Nite‑Out II contain live Nitrosomonas and Nitrobacter for both freshwater and saltwater tanks.
- Better Than Starter Alternatives: Homemade cycling with fish food is messy and unreliable. Bottles offer controlled, predictable results.
- Instant Colony Kickstart: Add directly to filter media; bacteria colonize immediately, protecting fish from day one.
A small $8 bottle beats losing $50 in fish—simple math.
For cold climates, some formulations maintain viability at temperatures down to 42°F.
Avoid Decor That Tears Fins or Traps Fish
Setting up the perfect bacteria colony means nothing if your fish slice their fins on a plastic castle. Sharp ornaments and rough artificial plants are fin-tearing traps. Run your hand over every decoration; if it snags, skip it.
Smooth silk plants or rounded, ceramic hides are safer. A torn fin invites infection, and that’s a headache you don’t need.
Stick to soft, fish‑safe decor—your tank should be a home, not a hazard. Bottom line: if it feels rough, leave it out. Your fish will thank you by not bleeding. For safe alternatives, look for decorations made from BPA‑free plastic or ceramic that are designed to prevent injury. Additionally, many fish‑safe artificial plants use a weighted ceramic base for stable anchoring in the tank.
Why Testing Water Weekly Prevents Sudden Fish Loss
A weekly water test isn’t busywork—it’s early detection that stops a silent killer. Ammonia, invisible and odorless, builds fast, stressing fish until they die.
A weekly water test isn’t busywork—it’s early detection that stops a silent killer.
Weekly monitoring catches spikes before symptoms appear, making sudden loss prevention simple. You’re part of the club that keeps tanks thriving.
- Test for ammonia—it’s the top killer; levels should be zero at all times.
- Check nitrite next; even tiny amounts mean your cycle is incomplete.
- Monitor pH stability—dramatic shifts weaken fish immunity quickly.
For precise readings, use liquid reagent kits which offer lab-grade ±5 % accuracy. Consistent logging in a notebook each morning reveals trends that prevent issues before they become emergencies.
Bottom line: test every seven days, no exceptions. Your fish depend on it.
Choosing Gravel That Won’t Hurt Bottom-Dwelling Fish
If your bottom-dweller enjoys a belly full of scratches (they don’t), choose gravel with smooth edges—sharp gravel can injure barbels and delicate undersides.
You want a substrate texture that feels soft to the touch, like fine sand or rounded pebbles.
Gravel size matters: small, 1–2 mm granules are best.
They prevent food from trapping beneath them, reduce waste buildup, and let your fish sift comfortably.
A thick, smooth layer of substrate creates a safe home base.
Stick with trial-proven options like CaribSea Super Naturals—no surprises, just happy, healthy bottom-feeders. This brand’s Moonlight Sand is particularly gentle on fish barbels and reduces injury risk.
For additional safety, choose gravel that is pH‑neutral and non‑toxic to maintain stable water chemistry.
The Overcrowding Mistake: Add Fish Slowly, Not All at Once
- Use a quarantine tank for each new fish; it stops diseases from infecting your main tank.
- Add fish in small groups, never more than 10% of your tank’s capacity per week.
- Test water daily after each addition—ammonia should stay zero, not spike like a bad joke.
- Choose options like Transparent observation windows to reduce stress on isolated fish during quarantine.
- Use a fine-mesh net to gently transfer delicate fish without damaging their fins or scales.
Frequently Asked Questions
How Do I Know What Wattage Heater My Tank Needs?
Heater sizing depends on tank volume; a general rule is 5 watts per gallon. For a 20-gallon tank (best for beginners), a 100-watt heater like the Fluval M works well, preventing fatal temperature drops.
Place the thermometer on the opposite end to confirm uniform heating—dad joke: your fish hate cold feet too.
Most tropical fish need 75-80°F, so match wattage to tank size, not wishful thinking.
Can I Use a LED Light Made for Plants on a Fish-Only Tank?
Yes, absolutely. Think of a plant light as a sun lamp for your tank’s invisible garden of algae—it feeds plant growth, certainly, but that same light spectrum likewise makes fish colors pop and establishes a healthy day/night rhythm.
For a fish-only setup, a light around 5000 kelvin works fine. No need for the 6000-8000 kelvin plant-growth spectrum.
A timer helps too—fish appreciate routine, in spite of the fact that they don’t say thanks.
Bottom line: a plant light is overkill but won’t hurt.
Do I Need an Air Pump if My Filter Already Creates Surface Agitation?
No, you don’t need an air pump if your filter already creates surface disruption. That rippling water does the same job—oxygen exchange—without extra gear.
A bubble wall or CO2 injection are for specialized setups, like planted tanks demanding gas control. For a fish-only tank, skip the pump. It’s one less cord to hide.
Use that cash for a better heater or treat your fish to premium flakes. Less clutter, same result.
How Often Should I Replace the Filter Media in My Aquarium?
Filter media isn’t replaced on a set schedule—only when it’s falling apart.
The truth is, most media, especially reusable types like ceramic rings or sponges, should last months or years if rinsed in old tank water.
You don’t replace it until it’s literally crumbling.
That’s since the lifespan of biological media depends on keeping bacteria colonies intact.
Tossing media early crashes the cycle, killing fish.
Do it rarely, only when clogged or broken, and your tank stays stable.
Stick with reusable media; it saves cash and hassle.
What Is the Best Way to Clean Gravel Without Disturbing Beneficial Bacteria?
The best way to clean gravel is with a gravel vacuum using a gentle siphon technique—this stirs up debris without uprooting the good bacteria living deep in the substrate.
Press the tube into the gravel, let the suction pull waste, then lift. You’ll remove gunk, not your bio‑filter. It’s like a tidy spa day for the tank, not a demolition. Bottom line: stick to light spot‑cleaning weekly, and your bacteria colony stays safe.
Rounding Up
Setting up that first tank doesn’t have to be a fish funeral. Avoid tiny tanks, weak filters, and direct sunlight, and you’ll skip 90% of beginner heartbreak. Test your water weekly (ammonia is silent killer), add fish slowly, and choose gravel that won’t shred barbels. Bigger tanks forgive mistakes; small ones magnify them. Bottom line: spend $50 extra upfront or $100 in dead fish later.