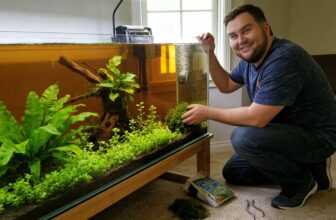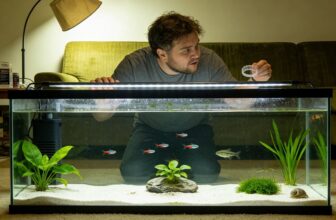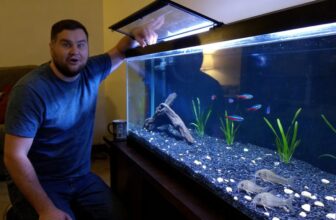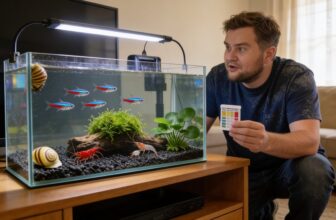
You’ll start with a bold tank shape—tall column, bow-front, or vertical bookshelf—then set it on a thrifted dresser you reinforce with cross-bracing.
Layer $5 hardware-store gravel, dark tones in back and light in front, then anchor your rocks with aquarium-safe silicone so nothing shifts.
Clip a $15 LED strip to the rim, set a timer for sunrise and sunset, and hide messy cords behind a hollow plastic rock or tall plants.
Your living painting emerges slowly, and the next steps are simpler than you’d guess.
At A Glance
- Repurpose thrifted furniture into reinforced stands for bold tank shapes that serve as room-dividing statement pieces.
- Layer three-color gravel substrates and DIY foam backgrounds to create depth and visual impact on a minimal budget.
- Arrange low-light plants using the rule of thirds grid with smart LED strips and timers for under forty dollars.
- Conceal equipment with cable management, hollow decor, and foam covers while swapping to sponge filters and DIY CO₂ systems.
- Follow a streamlined weekly maintenance routine testing water, controlling algae, and trimming plants to sustain the artistic display.
Pick a Tank Shape That Steals the Show
Why start with a plain box when your aquarium could become a living sculpture?
Your aquarium shouldn’t hide in a corner—it should command the room like art.
You walk into a room, and your eye catches something unexpected—a tall column tank rising like a tree trunk, or a bow-front curve that seems to breathe. These shapes cost only slightly more than basic rectangles, sometimes less if you’re patient watching sales. A budget tank with a bold silhouette transforms your space without draining your wallet.
You feel pride when guests pause, lean closer, ask questions. The shape does the heavy lifting, so you spend less on decorations inside. You’re building atmosphere first, filling details second.
A vertical bookshelf design like the Lifegard 16-gallon shelf model stands 33.85 inches tall, turning your aquarium into a room-dividing statement piece that works for fish, corals, or even reptiles.
Turn Thrifted Furniture Into a Custom Aquarium Stand
Three sturdy pieces—an old dresser, a solid nightstand, or a wooden cabinet—can become the foundation for your aquarium.
You’ll feel proud, building something lasting from forgotten things. DIY stands reward patience with character reclaimed wood brings. Match your base to tank capacity needs, since 20-gallon systems require floor space and larger structural commitment than desktop alternatives.
| Base Piece | Reinforcement Needed | Final Touch |
|---|---|---|
| Dresser | Braced legs, plywood top | Fresh paint, sealed edges |
| Nightstand | Cross-bracing inside | Stained finish, new knobs |
| Cabinet | Extra center support | Cut doors for filter access |
Check that joints hold, that weight won’t sag. Your fish depend on steady ground. Measure twice, cut once, breathe deep. Saving money feels satisfying.
Build Layered Aquascape Substrate Without Specialty Markups
Before you plant a single stem, you’ll need to build the ground your aquascape stands on, and you don’t need fancy bags labeled “premium” to do it right.
Grab two or three colors of basic gravel from a local hardware store—tan, dark brown, black—each costing around five dollars for a ten-pound bag.
Start with coarse pebbles at the bottom, then layer finer gravel on top; that’s substrate grading, sorting sizes like stacking blocks from big to small.
Blend your colors wet in a bucket first, so you’ll see how they marry.
Layer an inch of dark tones at the back, lighter at the front, for color blending that pulls your eye gently deep into the tank.
Your plants will grip these humble layers without complaint.
Be sure to rinse your gravel at least twice before adding it to the tank, as proper rinsing prevents cloudy water syndrome and protects your aquascape’s visual appeal.
Sculpt Hills and Slopes for Instant Depth
Flat ground feels safe, but it doesn’t pull you in—you’ll fix that by building hills that trick the eye into seeing more than the glass walls allow.
Pile dark gravel higher at the back, 3-4 inches, sloping down to 1 inch up front.
This gradient creates distance where none exists, like a road shrinking toward the horizon.
You’ll feel space opening, a small relief, as your gaze travels upward.
Add coarse sand threads through fine pebbles for texture contrast—rough against smooth, catching light differently.
Your hands press shapes that matter.
Controlling water flow with adjustable chambers ensures your carefully built slopes remain stable and undisturbed by hidden currents below.
You’re building escape, not just decoration.
Glue Hardscape Rocks That Won’t Shift
With a steady hand, you’re about to anchor stone to glass, turning loose piles into solid land.
Silicone anchoring creates permanent bonds between rock and aquarium walls. You’ll dab aquarium-safe silicone—think of it as underwater glue—onto contact points, then press firmly for thirty seconds. Hold your breath; patience wins here.
Press firmly for thirty seconds. Hold your breath; patience wins here.
Rock caulking fills gaps between stacked stones, adding invisible stability. Apply thin beads where surfaces meet, wiping excess with a damp cloth before it cures in twenty-four hours.
Your aquascape stays fixed through filter currents and curious fish. That steadiness brings quiet confidence, knowing your built world won’t crumble.
For coral frags or precise small-scale repairs, a cyanoacrylate gel tube offers 30-second set times and dries invisible for clean, professional-looking bonds.
Use the Rule of Thirds for Pro-Level Composition
On a blank sheet, draw two faint lines down, two across, making nine squares like a tic-tac-toe board.
Place your focal points where lines cross, not dead center. You’ll feel calm seeing this visual balance, like a window that breathes. Elevating your light fixture with adjustable height risers lets you fine-tune shadows and highlights to accentuate these deliberate placements.
| Element | Purpose |
|---|---|
| Leading lines | Guide eyes through depth |
| Focal points | Anchor attention naturally |
| Grid intersections | Create visual balance |
Angle driftwood toward these crosses, forming leading lines that pull you inward. Stack rocks higher on one side, lighter on another. You’re building rhythm, not chaos. Move slowly. Step back every ten minutes. Feel which placement stirs something quiet. That’s your fish’s home, speaking back.
Trust the grid.
Choose Unkillable Plants That Look Expensive
The java fern sits in your hand like a crumpled green ribbon, roots still damp from the shop tank, and you already suspect you’ll kill it since plants always die on you.
You’re wrong this time.
Anubias, java fern, and cryptocoryne forgive your neglect. These three tolerate low light, shrug off irregular feeding, and still grow that expensive foliage aquascapers pay extra to feature.
Tie java fern to driftwood with cotton thread—it needs no soil.
You’ll spend eight to twelve dollars total, a budget friendly investment that outlasts finicky species costing triple.
Let rhizomes stay exposed, not buried, and you’ll feel capable, finally, with something living that stays alive.
Many enthusiasts also use Jungle Vallisneria as a tall background plant for that professional aquascape look, despite its full-sun requirement being stricter than these forgiving trio.
Layer Your Planting for Contest-Worthy Lushness
You’ve missed vertical layering. Stack three distinct heights: tall stem plants (Vallisneria, 12-18 inches) at the back, mid-size Cryptocoryne (6-8 inches) through the middle, and short carpet plants (Java moss, under 2 inches) pressed to the glass front. This creates depth you can practically walk into.
Build substrate depth into hills—three inches sloping to one—so plants grow at natural angles. Mind your plant spacing; leave thumb-width gaps between Cryptocoryne rosettes so each catches light and breathes. Add color contrast: deep red Ludwigia against light green ferns guides the eye like a path. Root‑tab fertilizers deliver slow‑release nutrients directly to these layered root zones, supporting sustained growth for rooted species like Cryptocoryne and swords without disturbing the visual arrangement.
Set Up Smart LED Lighting on a Shoestring
Since you want your fish to sparkle without emptying your wallet, you’ll start with a simple full-spectrum LED strip that clips onto your tank’s glass rim like a bookmark on a favorite chapter.
A simple LED strip clips onto your tank’s rim like a bookmark on a favorite chapter—sparkling fish, intact wallet.
You’ll master LED timer integration by plugging your strip into a basic digital timer, setting sunrise for 7 AM, daylight til 6 PM, and gentle sunset fade. This mimics nature’s rhythm, keeping fish calm and plants photosynthesizing steadily.
You’ll add wireless control through a $15 smartphone plug, adjusting colors from your couch without disturbing the glass.
Steps to smart lighting
- Clip the LED strip securely on your rim
- Connect to a programmable timer with sunrise, day, sunset settings
- Pair with a Wi-Fi plug for wireless control from anywhere
Your tank glows like living stained glass, controlled precisely, costs under forty dollars.
For compatibility with popular budget options, look for lights offering respectable PAR at substrate to ensure your Java fern and Anubias thrive even with lower-cost setups.
Hide Every Wire and Filter for a Clean Look
Since a tangled mess of cords and humming equipment distracts from the living picture you’ve built, you’ll learn to make every tube, wire, and black box disappear into the background like stagehands after the curtain rises.
Start your wire concealment by bundling cables with reusable Velcro straps, then tuck them behind your tank stand using adhesive cable clips placed every six inches. You’ll feel calmer when clutter vanishes.
For filter camouflage, position tall plants like Cryptocoryne around the intake, or slip a hollow plastic rock—easily found at pet stores for under eight dollars—over the filter body.
Cut black foam board to hide heater tubes against dark backgrounds.
If you’re running multiple heaters, consider a dual-outlet aquarium controller to consolidate wiring and monitor temperature from a single wall-mounted unit instead of running separate cords for each device.
Stagehands know invisibility is their art.
Create Custom Backgrounds From Dollar Store Finds
Building Aquarium Backdrops From Foam and Paper
A blank glass wall behind your tank is like an empty canvas waiting for story, so you’ll turn cheap foam boards and printed paper into worlds that cost less than a fast-food meal.
Cut foam boards to fit your tank’s exact height and width, measured in inches with a simple ruler.
Measure twice, cut once—your tank’s exact dimensions in inches become the foundation of a backdrop that fits like it was made for the glass.
For your DIY backdrop, you’ll layer three elements:
- Flat black poster board as your depth base,
- Cut-out printed images of plants or rocks glued on top,
- A sheet of frosted contact paper for misty distance.
Secure edges with aquarium-safe silicone, not tape.
Search thrifted frames at yard sales, then remove glass and mount foam inside for instant polish.
You’re building illusions that feel calm, not costly.
Power Your Aquarium for Pennies With Equipment Swaps
Smart Gear Swaps on a Tight Budget
Swap pricy equipment for clever fixes, saving dollars without surrendering health.
| Swap This | For This | You Save |
|---|---|---|
| Canister filter | Sponge filter with powerhead | $40-80, same clear water |
| Pressurized CO₂ kit | DIY CO₂, yeast, sugar bottle | $150, gentle bubbles daily |
| Brand-name heater | Used adjustable from aquarist club | $25, steady 78 degrees |
Budget filtration runs quiet, sucks debris, breeds good bacteria your fish need.
DIY CO₂, made with two-liter bottles, tubing, diffuser, costs pennies monthly.
Plants pearl oxygen, grow thick, glow green.
You feel proud, capable, smart.
Your tank thrives, your wallet breathes.
Build Five Nature Themes Using Free Hardscape
Five Nature Themes Using Free Hardscape
When you walk past a riverbank or turn over a log in the woods, you’ll spot treasures most people ignore: smooth stones, twisty roots, and hollow bark.
You collect these free gifts, scrub them clean, and bake at 200°F for two hours to kill hidden germs.
You build five nature themes from found hardscape.
- Forest Floor: Stack flat stones three inches high, tuck moss between layers.
- Riverbed Ribbon: Line quartz pebbles in a gentle S-curve across dark gravel.
- Cave Shelter: Prop a hollow bark tube against glass for shy fish.
You’ll monitor ammonia with budgetwater testing kits weekly.
You’ll limit light to six hours daily for algae control.
Your tank becomes living art without spending much money.
Maintain Your Aquascape With a Weekly Routine
Your hardscape themes now rest in the tank, stones settled, bark anchored, and you’ll feel a quiet pride seeing fish investigate caves you built.
| Task | Time |
|---|---|
| Water testing: pH, ammonia, nitrates | 10 minutes |
| Algae control: scrape glass, wipe décor | 15 minutes |
| Trim plants, siphon debris | 15 minutes |
| 20% water change | 20 minutes |
You’ll clip leaves that shadow neighbors, just like pruning a garden hedge. Test water parameters with strips, watching colors shift to tell the tank’s story. Scrape algae before it carpets glass—that thin green film spreads fast, like moss on old bricks, and steals light from plants. You’ll feel calm focus returning, each small act preserving the world you’ve built.
Frequently Asked Questions
How Long Before Adding Fish to New Tank?
Wait four to six weeks for your tank’s nitrogen cycle to establish, testing ammonia and nitrite until both read zero. You’ll know your cycling timeline’s complete when nitrates appear, ensuring safe conditions before adding fish.
Can I Use Regular Tap Water Safely?
You can’t use regular tap water safely until you address tap water safety concerns. You must use chlorine removal methods—either liquid dechlorinator or letting water sit 24 hours—to make it safe for your fish.
How to Stop Glass Lid Condensation?
You’ll reduce condensation by improving lid airflow—prop the glass slightly or add small vents. Check your seal gasket isn’t trapping moisture; replace worn ones. You can additionally wipe the underside daily or use a moisture-absorbing mat underneath.
Which Fish Eat Algae Best?
You’ll find otocinclus, siamese algae eaters, and amano shrimp among the most effective algae eating fish, boosting your tank biodiversity as keeping glass and plants spotless with their constant grazing habits.
How to Travel With Aquarium Temporarily?
You’ll secure fish in sealed bags with tank water, pack them in insulated containers, and set up a portable transport setup with battery‑operated portable filtration to maintain water quality during brief relocations.
Rounding Up
You’ve built something real. Those layered slopes catch light like small hills at dawn, and your thrifted stand holds steady, proud. The fish glide through spaces you shaped with patience, not money. This feeling—quiet pride, a soft hum of care—is earned. Keep tending it weekly, watching roots grip stone, watching life settle. Art lives here now, made by your hands, seen by your eyes. That’s enough. That’s plenty.